What is Silk Screen Printing?
Screen printing is a method of transferring ink onto a surface (such as fabric) using a fine mesh screen and a squeegee. Though it sounds technical, the process follows a clear, step-by-step approach that combines precision with creativity.
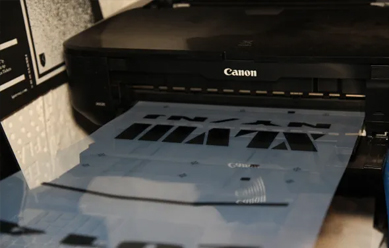
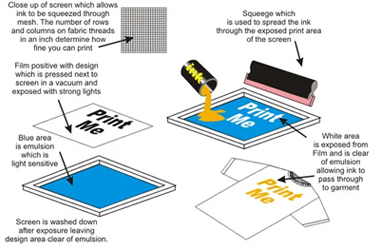
It begins with the artwork. Each colour in the design is separated digitally so that individual screens can be created for each colour layer. These separations are printed on transparent sheets, which guide the next stage of the process.
Curing the Ink
To make the print durable, the ink must be cured with heat. Most t-shirt designs use Plastisol ink, which contains PVC resin, plasticisers, and pigments. When heated to around 330°F (about 165°C), the particles in the ink fuse together, forming a smooth, solid layer that permanently bonds to the fabric.
The printed shirts are placed on a conveyor belt and passed through a dryer that uses infrared heat. After about 30 seconds to a minute, the shirts come out fully cured and ready for folding, packing, and wearing.
Printing the Design
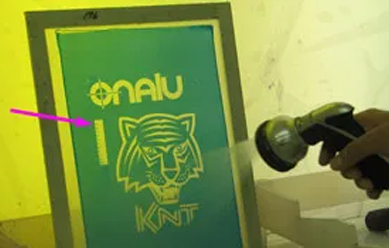
Once the screens are ready, they’re mounted onto a printing press and carefully aligned to ensure each colour layer lines up perfectly. Ink is poured onto the screens, and squeegees are used to press the ink through the stencil openings and onto the fabric beneath.
Each colour is printed one at a time, with the shirt or fabric moved along the press between prints. After running a few test prints to ensure proper alignment and colour balance, the actual printing begins. Once all colours are applied, the shirt is removed from the press (though the ink at this stage remains wet).
Preparing the Screens
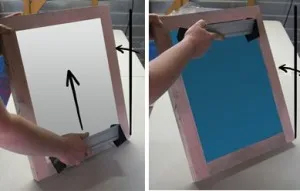
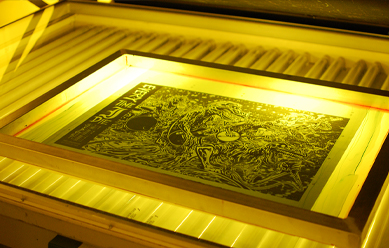
A screen is made up of a wooden or aluminium frame stretched tightly with a fine nylon mesh. This mesh is coated with a light-sensitive emulsion, a special chemical that reacts when exposed to ultraviolet (UV) light. The transparent film with the design is placed over the coated screen and exposed to UV light in an exposure unit.
The light hardens the emulsion in areas that are not blocked by the design, while the covered parts remain soft. These unexposed areas are then rinsed away with water, creating open spaces where ink will later pass through, forming a stencil of the design.